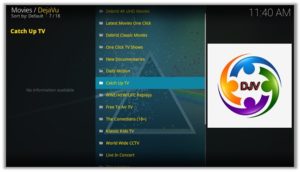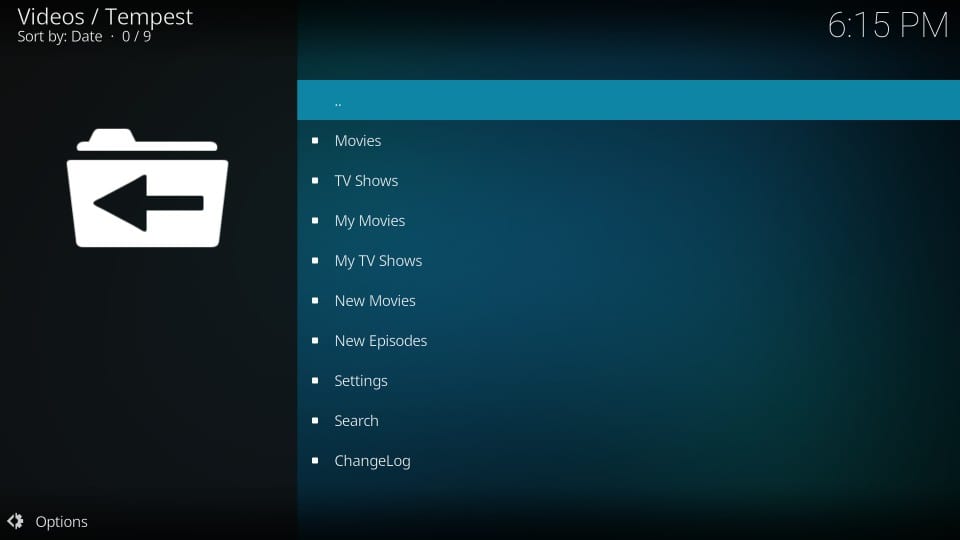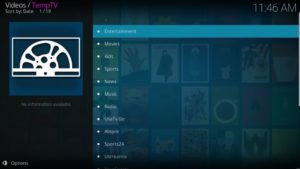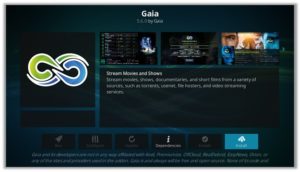
In this guide, I have discussed how to install TEPMTV on Kodi. TempTV is an All-in-One Kodi addon that includes sections like Movies, Kids, Sports, News, Music, Live IPTV, and more.
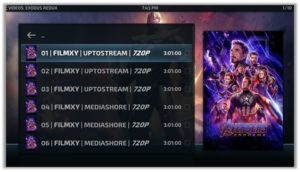
It comes from the Tempest Repository and one of its popular sections is 1-Click where you can watch all the TV shows and movies without any buffering issues.
⚠️ Streaming free content through third party Kodi builds and addons like TempTV is very risky and it sometimes get users in trouble with the law. This is due to streaming the pirated, copyrighted, or censored content through these addons. So, it is a wise choice to use a VPN Service with Kodi.
A Kodi VPN helps you be anonymous online from hackers, phishers, spammers, and even from ISPs and let you stream geo-restricted content even through torrent links.
How to Install TempTV on Kodi
- TempTV Addon Repository
- How to Install TempTV Addon on Kodi Leia & Krypton (Version 17 or Higher)
- How to Install TempTV Kodi Addon on Jarvis (Version 16 or Lower)
- How to Get a VPN Protection on Kodi (49% Off Coupon)
- TempTV Kodi Addon (Direct Installation Method)
- How to Install TempTV on Kodi Fire TV Stick
- Kodi TempTV Not Working / Errors / Fixes
- How to Update TempTV on Kodi
- How to Uninstall TempTV Addon on Kodi
- TempTV Addon for Kodi: FAQs
TempTV Addon Repository
In the world of Kodi addons, old repositories abandoned and expires sometimes while new repositories replace their place. Even sometimes you have to wait a bit for the new working repository to replace already broken or outdated repository.
You’ll always find the latest and working repository for TempTV addon here. We check for these repositories frequently and update them accordingly.
Kodi TempTV Repo Name: TempTV Repo
Kodi TempTV Repo URL: https://tempest0580.github.io/
How to Install TempTV Addon on Kodi Leia & Krypton (Version 17 or Higher)
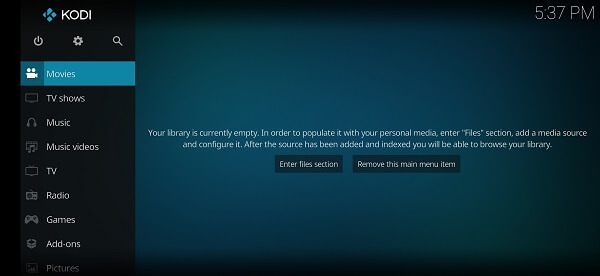
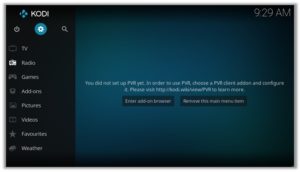
1. Open Kodi media player and go to the Settings
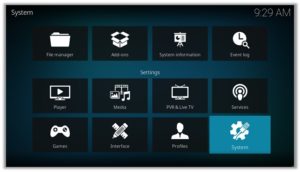
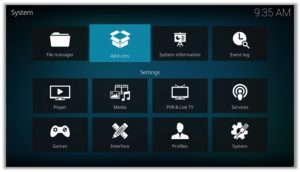
2. Select System option
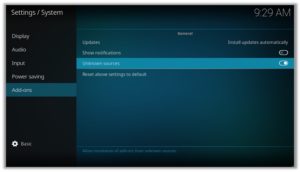
3. Click on Add-ons and then enable Unknown Sources
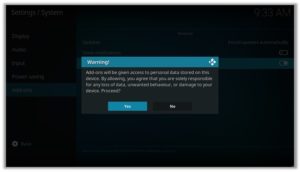
4. Click Yes when the message prompts
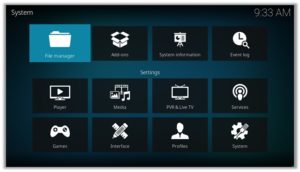
5. Now go one step back to the Settings menu and then click on File Manager
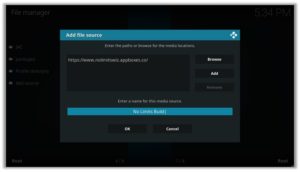
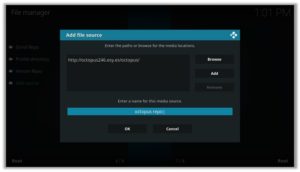
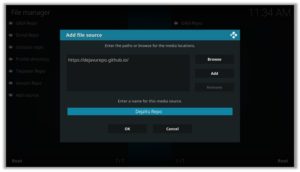
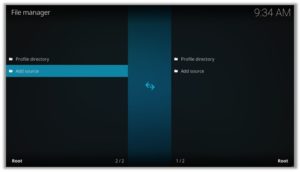
6. Double click on Add Source
7. A box will open, so click None
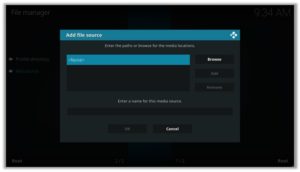
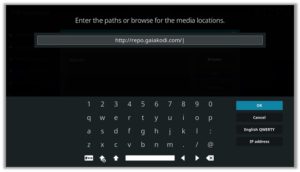
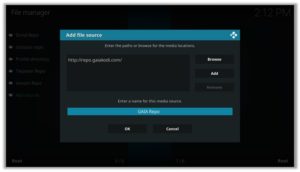
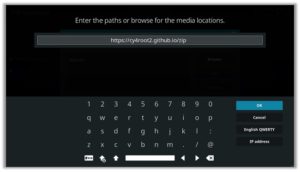
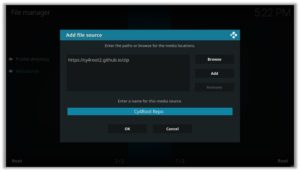
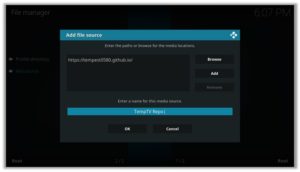
8. Now enter URL https://tempest0580.github.io/ and click OK

9. Enter the name i.e. TempTV Repo and click OK to close the box
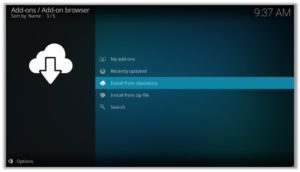
10. Go one step back to the Settings menu and then click on Add-ons
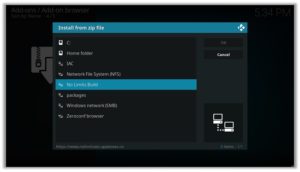
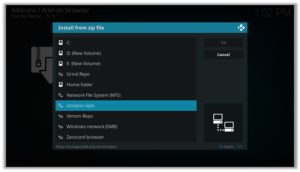
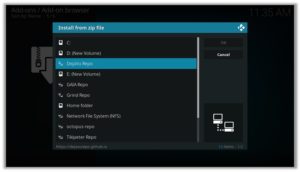
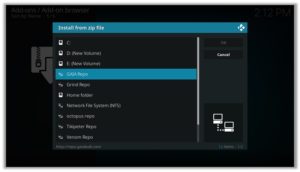
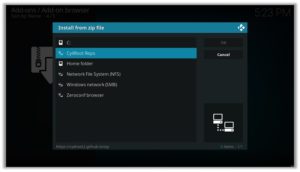
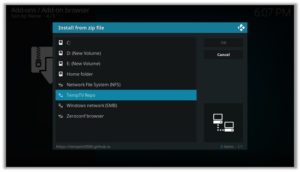
11. Select Install from Zip File
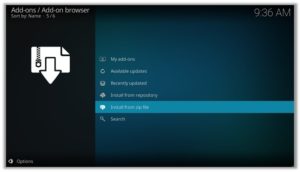
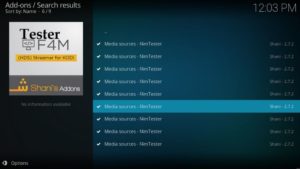
12. A box will open where you will need to click on TempTV Repo
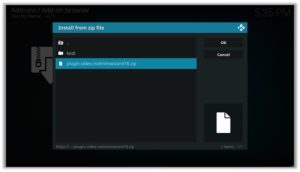
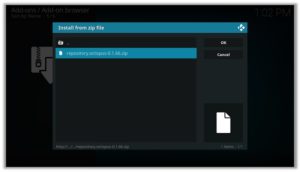
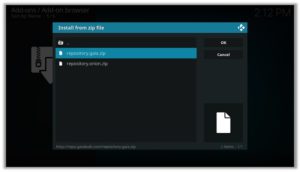
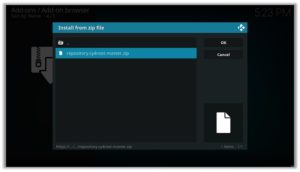
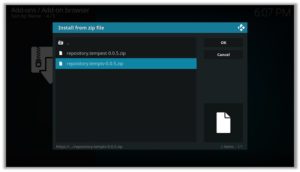
13. Now select repository.temptv-0.0.5.zip and wait till installation completed
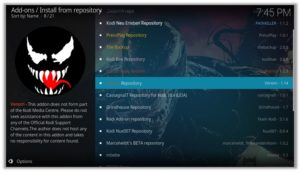
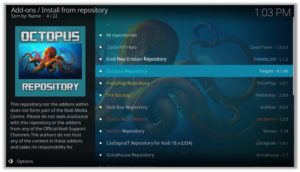
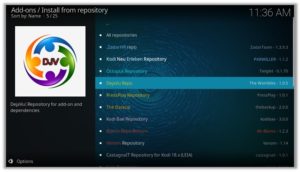
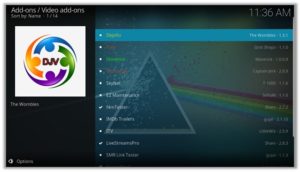
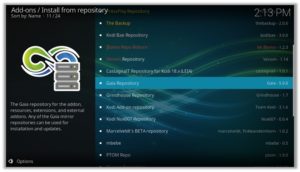
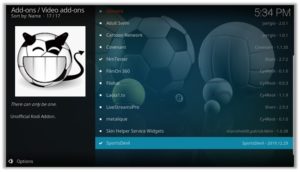
14. Once installed, click on Install from Repository
15. Find and click on TempTV Repo
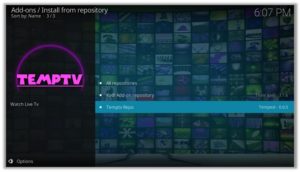
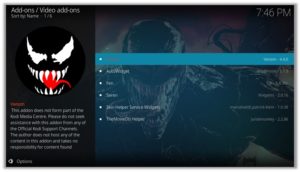
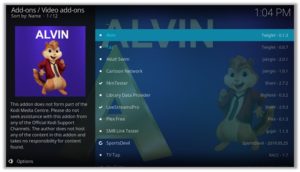
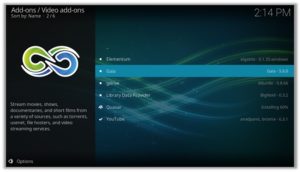
16. Now select Video Add-ons and then click on TempTV
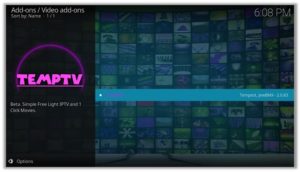
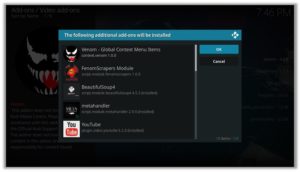
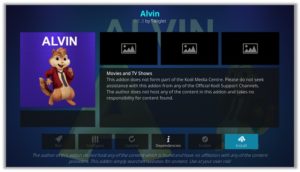
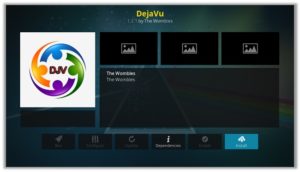
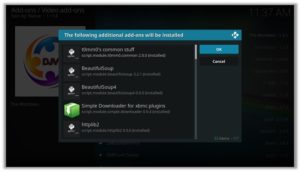
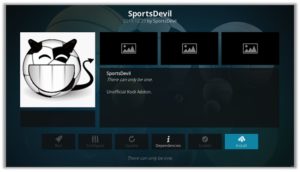
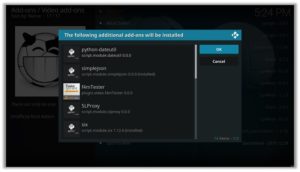
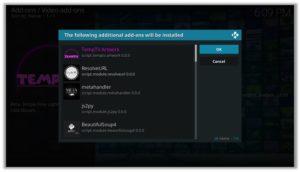
17. Press Install

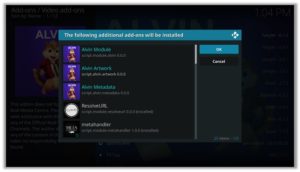
18. Click OK
How to Install TempTV Kodi Addon on Jarvis (Version 16 or Lower)
- Open Kodi.
- Go to the System.
- Click on File Manager.
- Double Click on Add source.
- Click ‘None’ > Enter https://tempest0580.github.io/ > Click Done.
- Name it TempTV Repo > Click Done > Click OK.
- Go back to home screen > Click System.
- Click on Add–ons > Install from zip file
- Select TempTV Repo >Click repository.temptv-0.0.5.zip > Wait for a few moments.
- Click Install from repository > TempTV Repo > TempTV > Install > OK > Wait again for the notification.
How to Get a VPN Protection on Kodi (49% Off Coupon)
Before you start streaming from the TempTV Kodi addon, you must be using a secure VPN to stay away from your ISP tracking. The number one recommended VPN for Kodi users is ExpressVPN. You can use it on 5 devices simultaneously.
You can get ExpressVPN at GB £6.67/mo (49% Off) for 12 months Plan with additional 3 months free.
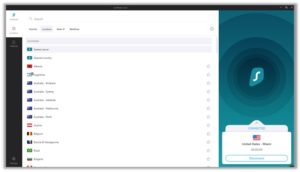
Here is how to install ExpressVPN on Kodi media player.
- Sign up for a ExpressVPN account and download its app on your device
- Run the app and sign in with your credentials
- Connect to the fastest server and start streaming videos on Kodi

TempTV Kodi Addon Description & Details
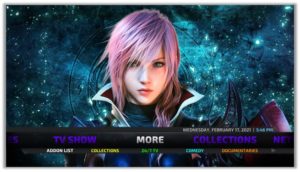
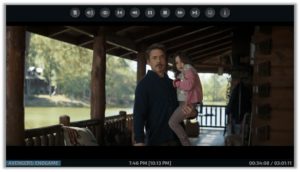
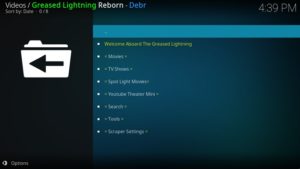
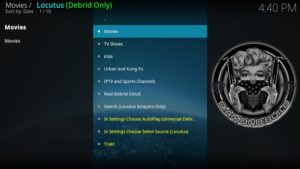
TempTV is one of the best Kodi IPTV addons with a lot of Live TV channels with news, sports, movies, Kids, Music, Radio, etc. To stream live US channels, you will have to connect to a US server of a VPN. Below is the screenshot of the CBN News channel streaming through The TempTV Kodi addon.

TempTV Kodi Addon (Direct Installation Method)
TempTV Kodi add-on has another installation method that requires you to download the TempTV Repository zip file directly on Kodi. This method can cut off the initial 3 steps as highlighted in the Kodi Krypton setup above. Here are the steps below:
- Download the TempTV Zip File and save it on your system.
- Launch Kodi > Click on Add-ons tab > Select Box-icon > Then Install from Zip File.
- When the box appears, you need to upload the downloaded Zip File > The installation will start.
- Now click on Install from Repository option > TempTV Repo > Video Add-ons > TempTV > Install > OK.
How to Install TempTV on Kodi Fire TV Stick
Other than Amazon Firestick apps, TempTV is one famous addon for FireStick. To directly install TempTV on Fire TV Stick, it is necessary that you install ES File Explorer and then install the zip file.
- To install ES File Explorer, follow the steps outlined below:
- Go to Fire Stick Home Screen > Click on Settings > Select System > Developer Option > Turn ON Apps from Unknown Sources and ADB Debugging option.
- A box will pop-up to declare warning, select OK
- Now follow the same steps mentioned earlier in this guide
A lot of users face errors like no stream available on TempTV while watching it on Fire Stick. However, the best way to fix this error is by installing the best vpn for fire stick.
Kodi TempTV Not Working / Errors / Fixes
If you’re facing Kodi not working issues regularly and haven’t got a working solution yet, then we highly recommend you to check our guide on “8 Common Fixes for Kodi Not Working Errors“.
Errors are a common issue faced by many Kodi users trying to stream via third-party Kodi add-ons. However, this causes great hassle for users as it creates disturbances in their streaming.
Check Log Error
Check Log error occurs if there are some files missing in the repository or if the system cache is full. This can happen with any third-party add-on and it is nothing to be worried about as it can be easily fixed.
Fix
Clear your Kodi cache and try accessing the add-on again, if it still does not work then the best thing to do is to start all over again. Download the Repository again and re-install the add-on, now try accessing the add-on. The add-on should work fine now.
Could Not Connect to Repository
If you misspell the URL or enter an invalid Repository URL, you get to see this error. Another reason you might be seeing this error is that the repository that you are trying to add might have gone down or obsolete.
Fix
Recheck the URL address you have entered by going to the File Manager. Then, check if the source URL is active and the repository Zip file is downloading or not. You will get the answer by checking these things.
How to Update TempTV on Kodi
Although Kodi updates addons automatically, however you can manually update addons to watch the latest content. Here is how you can update an addon on Kodi.
- Go to the Add-ons tab > Video add-ons
- Right click on the TempTV addon > Information
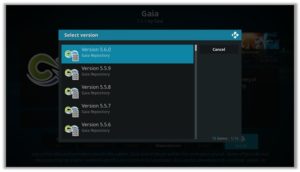
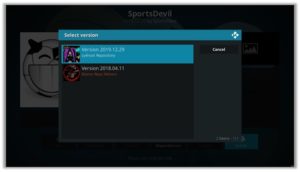
- Click on Update > Select the latest Version available
How to Uninstall TempTV Addon on Kodi
Uninstalling an addon in Kodi is a simple 3 steps process. If you’re familiar with the Kodi environment, You can easily navigate and perform different actions on Kodi including uninstalling an addon.
- Go to the Add-ons tab > Video add-ons
- Right click on the TempTV addon > Information
- Click on Uninstall > Yes > Yes
TempTV Addon for Kodi: FAQs
❓ Will I Need a VPN for TempTV Addon on Kodi?
Using a VPN with Kodi addons is not necessary but it is highly recommended. TempTV just like other third party addons sources free content from the web which is sometimes pirated and cause copyright issues. So, you should remain on safe side by using a VPN if you’re from the country which has strong Internet surveillance and related law.
Moreover, a VPN let you access geo-blocked content which you can’t stream otherwise.
❓ Can TempTV Addon be Installed on Fire TV Stick?
Yes, TempTV addon can easily be installed on Fire TV devices. We have discussed this above in detail. Refer to the section “How to Install TempTV on Kodi Fire TV Stick” above for instructions.
❓ What’s the difference between a Kodi Addon and a Build?
A Kodi addon is a piece of code compiled for a specific function to perform on Kodi. There are addons for Video, Music, Programs etc. Whereas a build is a more complex code, written with a lot of addons, skins, wizards, and additional functions to give Kodi users a visual all in one platform for their Kodi entertainment.
❓ Is TempTV Addon Legal?
Using TempTV addon on Kodi is legal itself but you have to make sure the content you’re watching through TempTV is not pirated or censored. As these addons get links from the web and there is a chance that these web sources may hosting copyrighted content which is not allowed to distribute freely. Always use a VPN with third party addons to remain on a safe side.
Adding Things Up
The entry of such great IPTV Kodi add-ons will surely help the industry grow and will help the streaming lovers in finding their favorite content for streaming on Kodi. Overall, it is a great Kodi add-on, has good quality streams, and works seamlessly. So, enjoy streaming with TempTV!
Using a secure VPN service with the TempTV addon is highly recommended for safe unrestricted entertainment. It keeps your identity hidden from online threats and even from your ISP and helps you access geo-restricted content in your country even through torrent links.